Physical Address
304 North Cardinal St.
Dorchester Center, MA 02124
Physical Address
304 North Cardinal St.
Dorchester Center, MA 02124


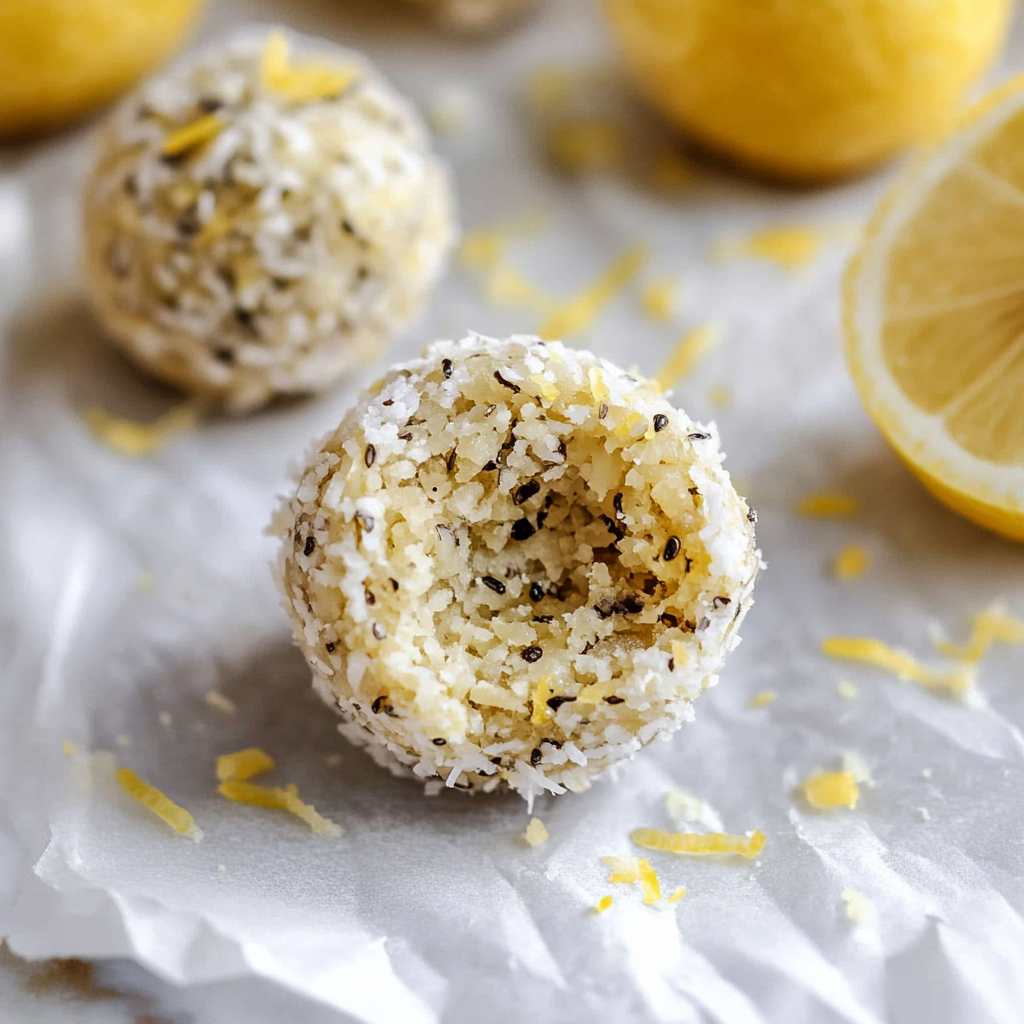
Lemon Bliss Balls are like little bites of sunshine wrapped in delightful, zesty sweetness. Picture this: you take a bite, and the tangy lemon flavor dances on your tongue, while the texture brings a perfect balance of creaminess and crunch. They are an explosion of flavors that can brighten even the cloudiest days, making them ideal for snacks, gatherings, or just indulging at home.
These blissful bites bring back memories of summer picnics where laughter floated through the air like butterflies. My Aunt Betty would whip up her famous lemon treats, and we’d forget our worries for a moment as we dove into those sunshiny delights. The best part? You can whip them up in no time and enjoy them anytime you crave a sweet treat that’s also good for you.
Here’s what you’ll need to make this delicious dish:
Rolled Oats: These provide the base and add a satisfying chewiness to your bliss balls. Use old-fashioned oats for the best texture.
Almond Flour: Adds a nutty flavor and helps bind everything together. Look for finely ground almond flour to avoid graininess.
Raw Honey or Maple Syrup: Sweetens the bliss balls naturally while adding moisture. Choose raw honey for its unique flavor or maple syrup for a vegan option.
Fresh Lemon Juice: This is where the magic happens! Freshly squeezed juice gives those bliss balls their signature zing.
Lemon Zest: For an extra burst of citrus flavor, don’t skip this ingredient. Use a microplane grater for fine zesting.
The full ingredients list, including measurements, is provided in the recipe card directly below.
Follow these simple steps to prepare this delicious dish:
Step 1: Gather Your Ingredients
Start by gathering all your ingredients on your countertop. This will ensure you have everything ready to go without any last-minute dashes to the pantry.
Step 2: Mix Dry Ingredients
In a large mixing bowl, combine rolled oats and almond flour. Stir them together until evenly mixed so that every bite is filled with goodness.
Step 3: Add Wet Ingredients
In another bowl, whisk together raw honey (or maple syrup), fresh lemon juice, and lemon zest. Pour this mixture into your dry ingredients and stir until well combined.
Step 4: Form the Balls
Using your hands (or a small cookie scoop if you want to feel fancy), roll the mixture into small balls about one inch in diameter. If they’re sticky, wet your hands slightly to make rolling easier.
Step 5: Chill Out
Place your formed bliss balls on a plate lined with parchment paper and pop them in the refrigerator for at least 30 minutes. This helps them set and makes them easier to eat.
Step 6: Enjoy!
Serve chilled or at room temperature as a delightful snack or dessert option. These Lemon Bliss Balls are perfect for sharing—if you can resist eating them all yourself!
Transfer to plates and drizzle with melted dark chocolate if you’re feeling extravagant; it takes these zesty treats over the top!
Start by preparing the lemon zest and juice, then blend all ingredients together until smooth. Chill the mixture before rolling into balls for that perfect texture. This sequence ensures everything blends nicely and gives you a refreshing treat.
Feel free to customize your Lemon Bliss Balls! Swap out almond flour for coconut flour, add nuts or seeds, or even mix in some dried fruits. Make them uniquely yours!
Store your Lemon Bliss Balls in an airtight container in the fridge for up to a week. They can be enjoyed cold straight from the fridge—no reheating needed!
Building these little bites has become a cherished ritual in my kitchen. I remember one sunny afternoon when my friends couldn’t believe how fast they disappeared at our picnic—everyone was begging for the recipe!
Lemon Bliss Balls typically consist of dates, nuts, oats, and lemon juice. For added flavor and texture, you can include ingredients like coconut or chia seeds. These energy bites are sweetened naturally with dates, making them a healthy snack option. You can also add plant-based gelling agents like agar-agar to achieve the desired consistency if you want to create a firmer texture.
To keep your Lemon Bliss Balls fresh, store them in an airtight container. They can be refrigerated for up to two weeks. If you want to extend their shelf life, consider freezing them. Place the balls in a single layer on a baking sheet until firm, then transfer them to a freezer-safe bag or container. This way, you can enjoy these delicious snacks whenever you crave something sweet.
Absolutely! Lemon Bliss Balls are highly versatile. You can substitute or add various ingredients to suit your taste preferences. For instance, try different nuts like almonds or cashews instead of walnuts for a unique flavor profile. You can also experiment with seeds like pumpkin or sunflower seeds for extra crunch and nutrition, making these bliss balls even more delightful.
Lemon Bliss Balls are a nutritious snack option packed with energy-boosting ingredients. They contain healthy fats from nuts, fiber from oats and dates, and vitamin C from lemon juice. This combination makes them an excellent choice for a post-workout snack or a midday pick-me-up. Enjoying these bliss balls in moderation as part of a balanced diet can contribute positively to your overall health.
Lemon Bliss Balls are an easy-to-make snack that combines wholesome ingredients for a deliciously energizing treat. With their bright citrus flavor and chewy texture, they offer both satisfaction and nutrition in every bite. Customize them with your favorite nuts or seeds for added variety while keeping the recipe simple and healthy. Enjoy these bliss balls as part of your daily routine to fuel your body with natural goodness!

Lemon Bliss Balls are a refreshing and healthy treat that bursting with zesty flavor. These no-bake energy bites combine the brightness of fresh lemon juice and zest with wholesome ingredients like rolled oats and almond flour. Perfect for snacks or dessert, they are quick to make and easy to customize for any occasion. Enjoy a taste of summer year-round with these delightful bites!
Keywords: For added texture, roll the balls in shredded coconut or crushed nuts before chilling. Swap almond flour for coconut flour or add seeds/nuts for customization.